
Hello and happy holidays, my beautiful chickpeas! This Easy Vegan Pie Crust is my go-to crust at Thanksgiving, and I am so excited for you to try it. It only uses 6 ingredients, is oil-free, and can even be used for savory pies or quiches when desired.
Be sure to pair this pie crust with my Easy Vegan Pumpkin Pie this year for the ultimate holiday dessert! Let's dive on in.
Inspiration for Easy Vegan Pie Crust
I've known for a while that I wanted to eventually release a Vegan Pie Crust. This one has been in the works for a couple years now (that's right, years!), and it's finally here! There is something special about making pie crust from scratch for your Thanksgiving feast, and now us vegans can do just that!

We obviously have a number of ingredient subs happening here to keep this vegan and overall more wholesome. Because of that, this is not at all a traditional pie crust. But it gets the job done nicely! It's easier to make than you probably expect, and it pairs well with every pie I've tried it with!
Ingredients
This Easy Vegan Pie Crust only uses 6 ingredients! Let's go over what we are working with today.

- Almond flour & whole wheat pastry flour: I tested this recipe with various ratios of different flours, and this was the best combination for our desired texture and consistency.
- Tapioca flour: this works perfectly in this pie crust recipe. It binds everything together well, but also keeps our dough relatively light and fluffy.
- Nondairy milk: the liquid that combines with all our flour to make a dough!
- Salt: for just a little bit of a flavor boost.
- Maple syrup: to add a tad bit of sweetness to our crust. You can leave this out if you are making a savory pie.
How to Make
Keep scrolling for the full recipe, but here are the basics.
- Whisk together dry ingredients and maple syrup.
- Gradually add in nondairy milk until a dough forms. Form the dough into a ball.
- Slowly roll out the dough using a rolling pin.
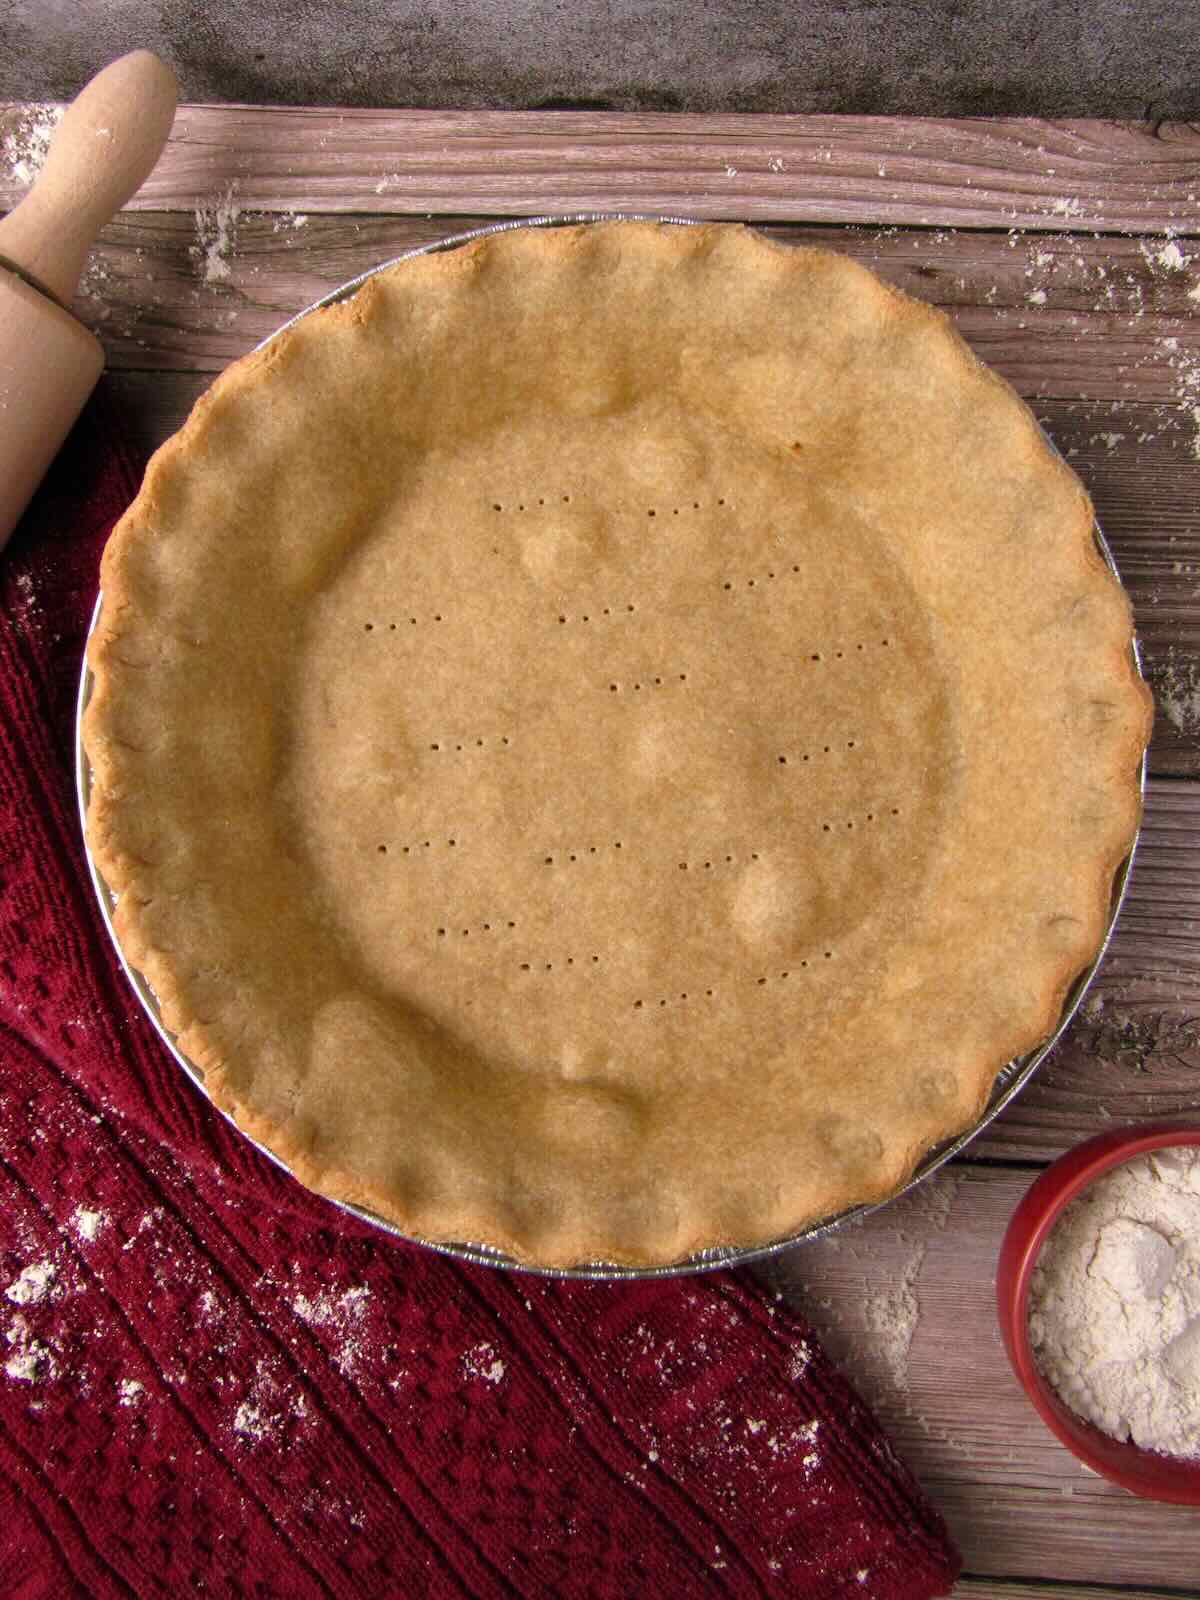
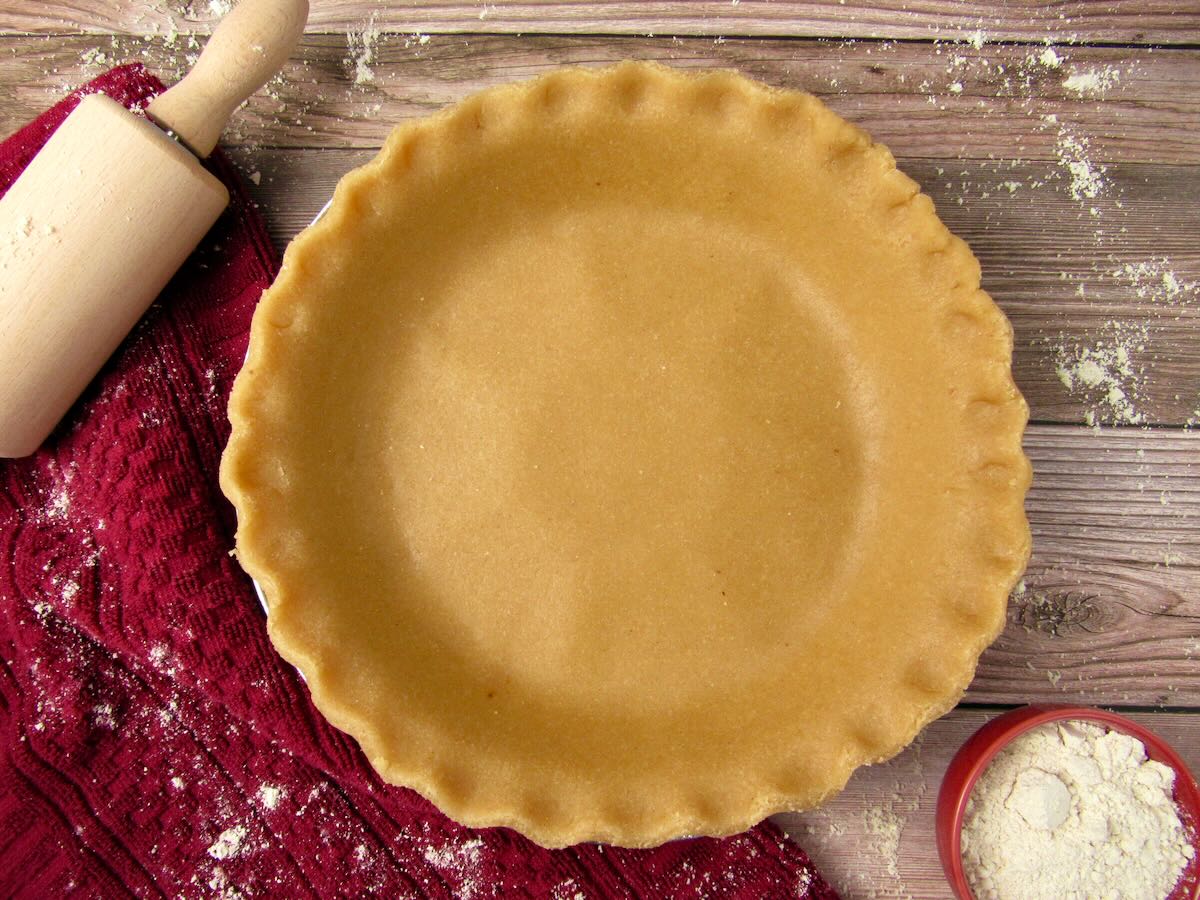
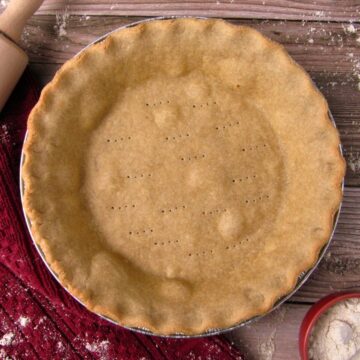
- Flip the dough into a pie dish and gently press the dough into the dish. Add a design along the edges if you desire.
- Poke several holes in the dough using a fork.
- Refrigerate at least 30 minutes.
- Assemble and bake your pie according to pie directions.
- Enjoy!
Tips & Tricks
Here are some general tips and tricks on how to best use this pie crust!

- This pie crust works perfectly for my Easy Vegan Pumpkin Pie - be sure to try it out this Thanksgiving!
- This crust would also work great for a vegan quiche or a savory pie, so get creative!
- In general you can follow the directions of your desired pie recipe for baking. But I did want to note that this crust is best when used in recipes that bake at a temperature of approximately 350-400F.
- It is recommended to use a pie shield at the beginning of baking. This can be removed 20 minutes before the end of baking.
- Looking for other vegan Thanksgiving staples? Be sure to also try out my Homemade Maple Cranberry Sauce and my Vegan Mashed Potatoes this holiday season!
Enjoy!
📖 Recipe
Easy Vegan Pie Crust (Oil-Free!)
Ingredients
- 1.5 cups almond flour
- ¾ cup whole wheat pastry flour
- ¼ cup tapioca flour
- ½ teaspoon salt
- 2 tablespoon pure maple syrup - (omit if using this crust for a savory pie or quiche)
- 6-8 tablespoon nondairy milk - (I usually use almond milk)
Instructions
- Add almond flour, whole wheat pastry flour, tapioca flour, and salt to a bowl. Whisk to combine. Whisk in maple syrup (if using).
- Gradually add nondairy milk and continue to mix as you go, until the dough can be formed into a ball. The exact amount of milk you use will vary a bit depending on a number of factors (how dry your almond flour was, the humidity of your kitchen, etc), so you likely may not need the full 8 Tbsp. If it's still not forming a dough after 8 Tbsp, you can continue to add more if needed. (You may use a stand mixer on a low setting for this step if you'd like).Form the dough into a ball using your hands - it should be damp but not sticky. If it is sticky, add small amounts of almond flour as needed.
- Use a rolling pin to slowly roll out the dough on a silicone baking sheet (or parchment paper). Slow is key here - using a lot of pressure to roll it out quickly can cause it to break apart. If you do encounter any small cracks, you can dip your finger in some water and gently seal the cracks with your finger. Roll until it is slightly larger than your pie dish, and about ⅛ inch thick.
- Gently place your pie dish, facedown, on top of the dough. Flip your dough and pie dish over so that the dough is now lying on top of the dish. The silicone sheet (or parchment paper) should now be on top - peel it off. Use your fingers to gently press the dough into the pie dish. If you have excess dough around the edges you may carefully cut off any excess. If desired, add a design to the edges of your crust by pinching all the way around with your fingers or by making small indents along the edge with a fork.
- Use a fork to poke several holes in the dough along the bottom of the pie dish.
- Refrigerate for at least 30 minutes (now is a good time to make whatever pie filling you desire).
- Assemble and bake your pie according to pie directions. (See the notes below for some general recommendations).It is recommended to use a pie shield along the edge of your crust at the beginning of baking, and then remove about 20 minutes before the end of baking.
Notes
Happy cooking! If you made this recipe don’t forget to tag me (@joyfulbalanceofficial) on facebook or instagram so I can cheer you on for your pie-crust-making ways.
Stay joyfully balanced!

Comments
No Comments